
3.2.1 Reasons for handling birds
There are a number of reasons why a project may involve handling birds (under the appropriate permits of course!). These include attaching tracking tags, leg banding for site fidelity or longevity assessments, dietary studies, rescue and rehabilitation campaigns etc. In these cases, it is often useful to collect a series of morphometric measurements while the bird is in hand which can aid in differentiating between sexes, identification of subspecies (or even the discovery of cryptic species), body condition and considerations of variation between subpopulations and within-populations. Standard measurements include.
- Weight (remember to subtract the weight of the bird bag if you are using one)
- Head-bill length
- Head length
- Bill length (length of bill from tip of beak to base of feathers)
- Nalospi length (bill length to nostrils)
- Bill depth at end of nostril
- Bill width at end of nostril
- Gonys depth
- Gonys width
- Wing (can be either flattened or un-flattened, make sure you standardise throughout your study and specify which you used)
- Tail length
- Tail fork length (if the species has a tail fork)
- Tarsus
- Length of middle toe
Measurements are important for identifying and separating rare species, and with many species can be used to identify sexes. For common species you may only need to take a few different measurements such as weight, wing length and bill length. If the species you are studying has never been studied at your location before then taking more measurements is important in case there are differences between locations where the species is breeding.
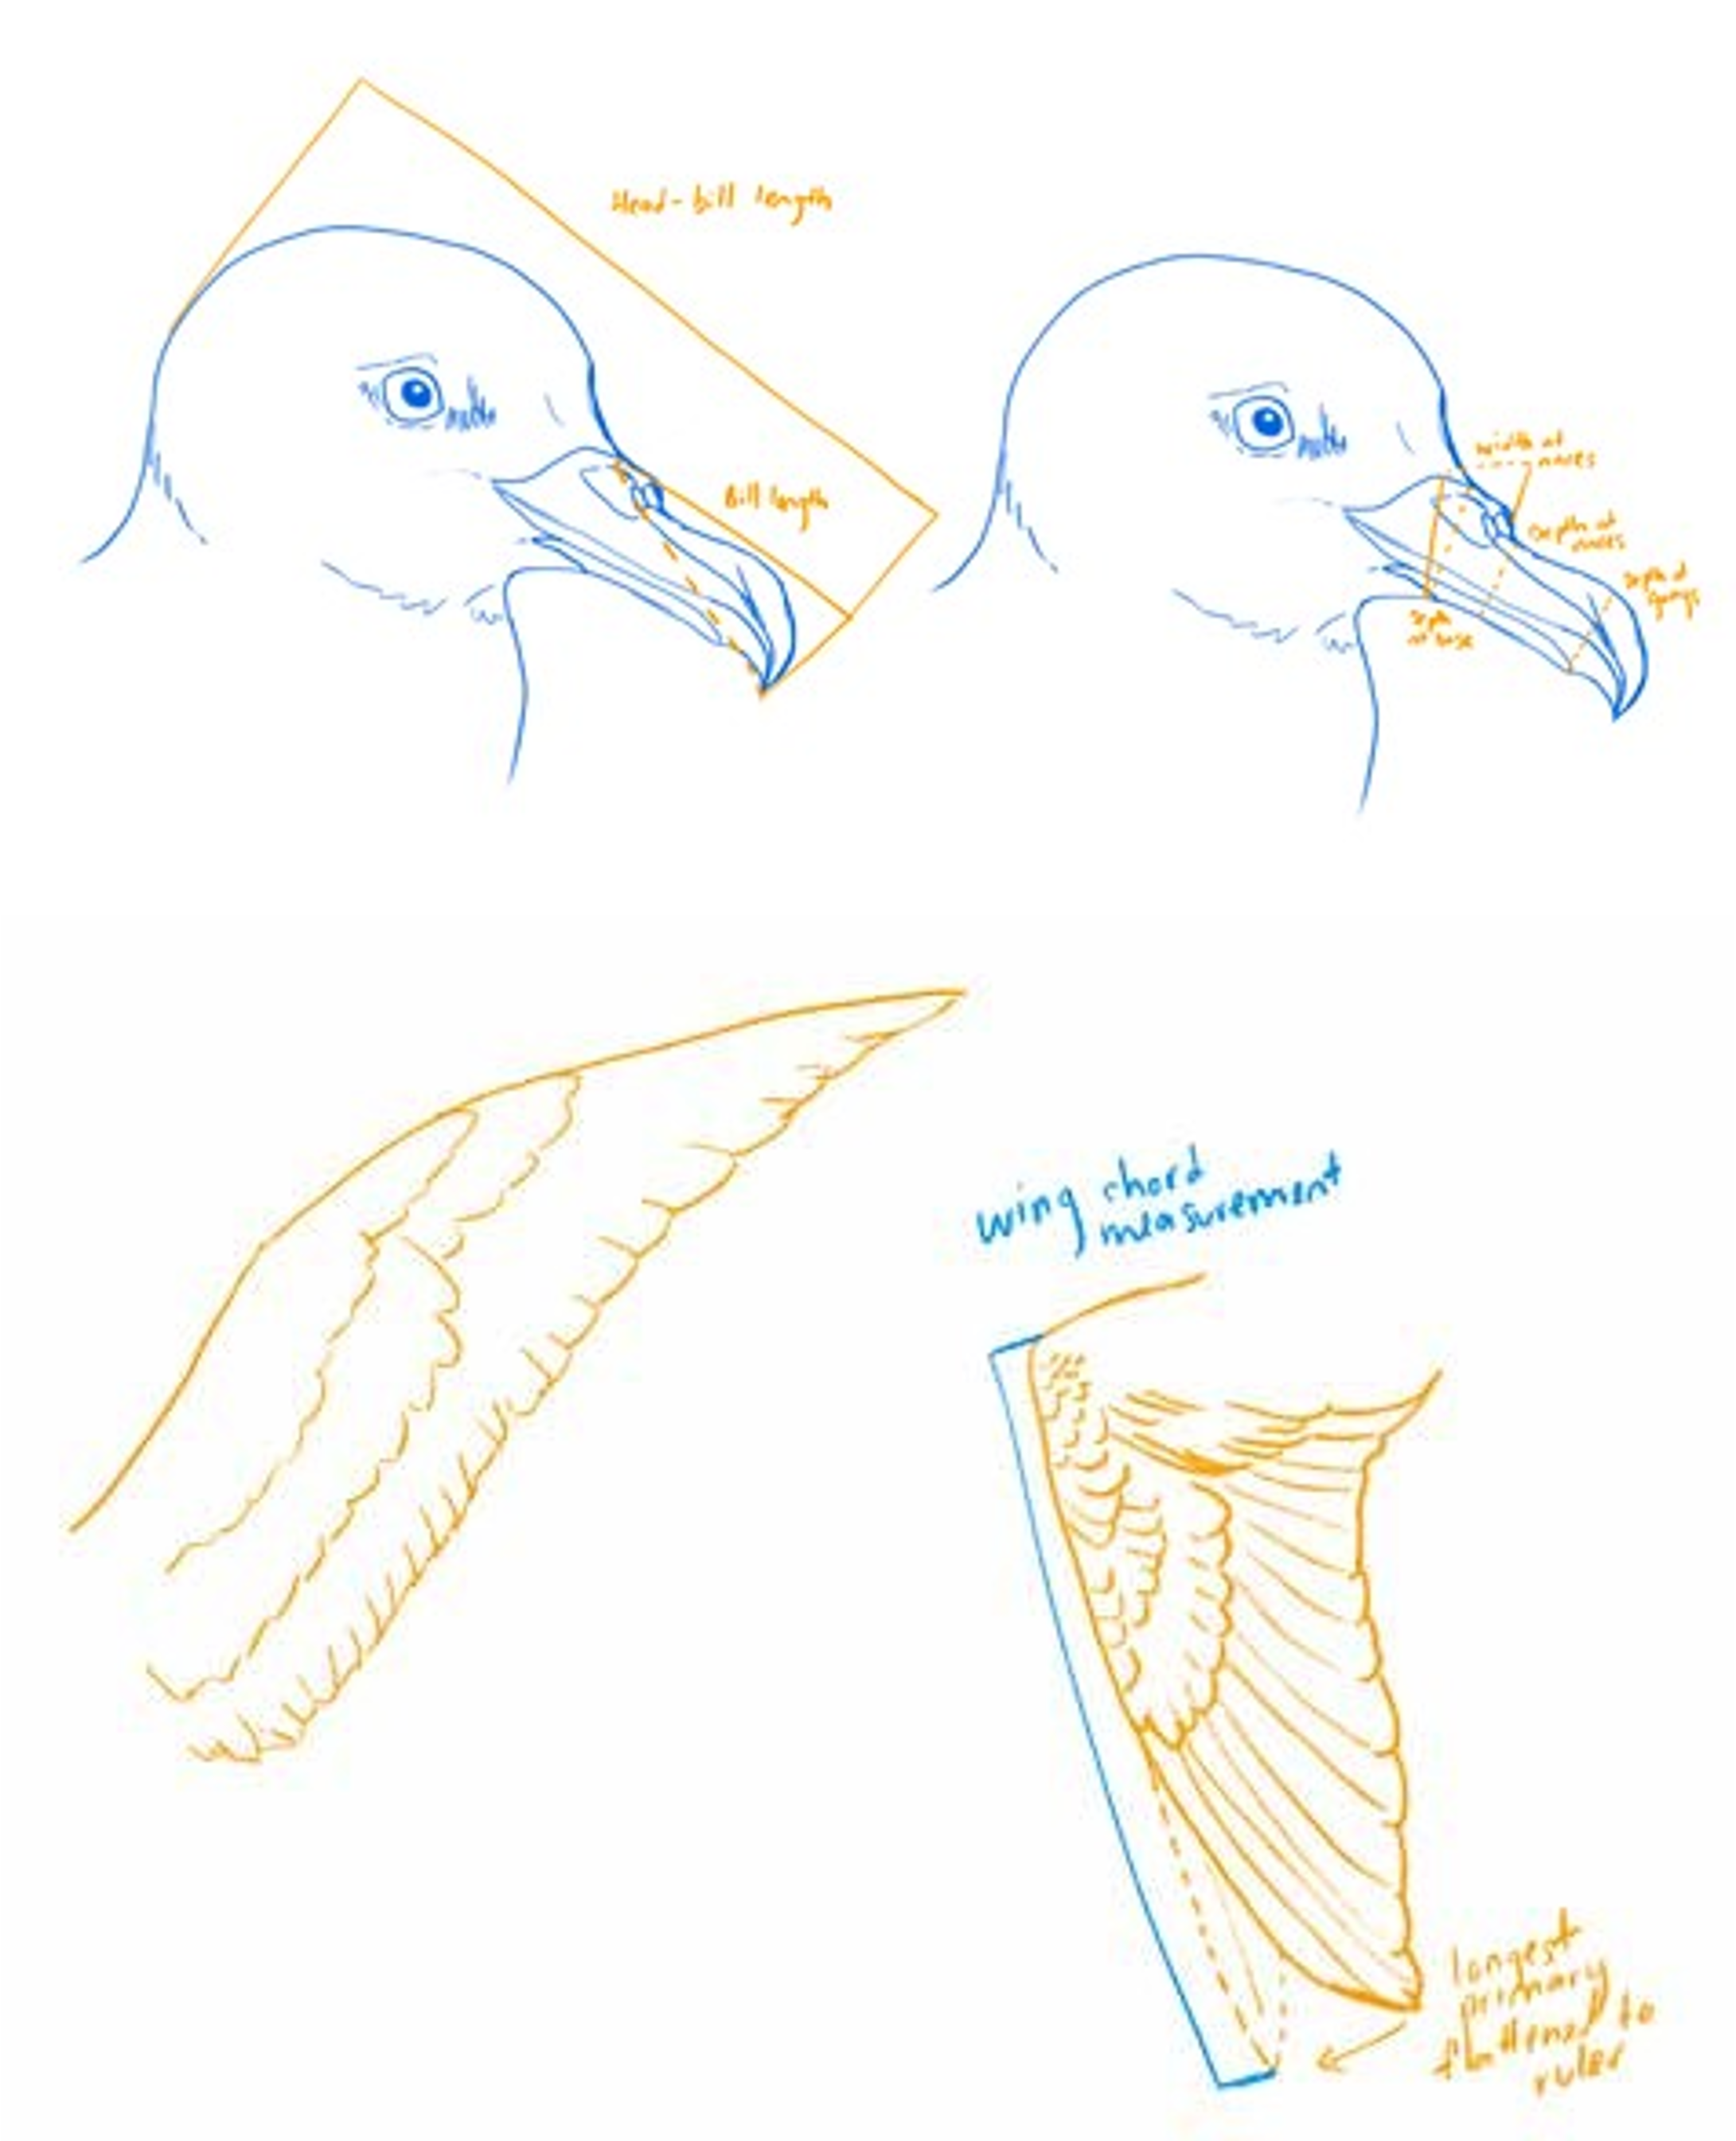
Figures 109-110. standard measurements. Graphics by Edin Whitehead.
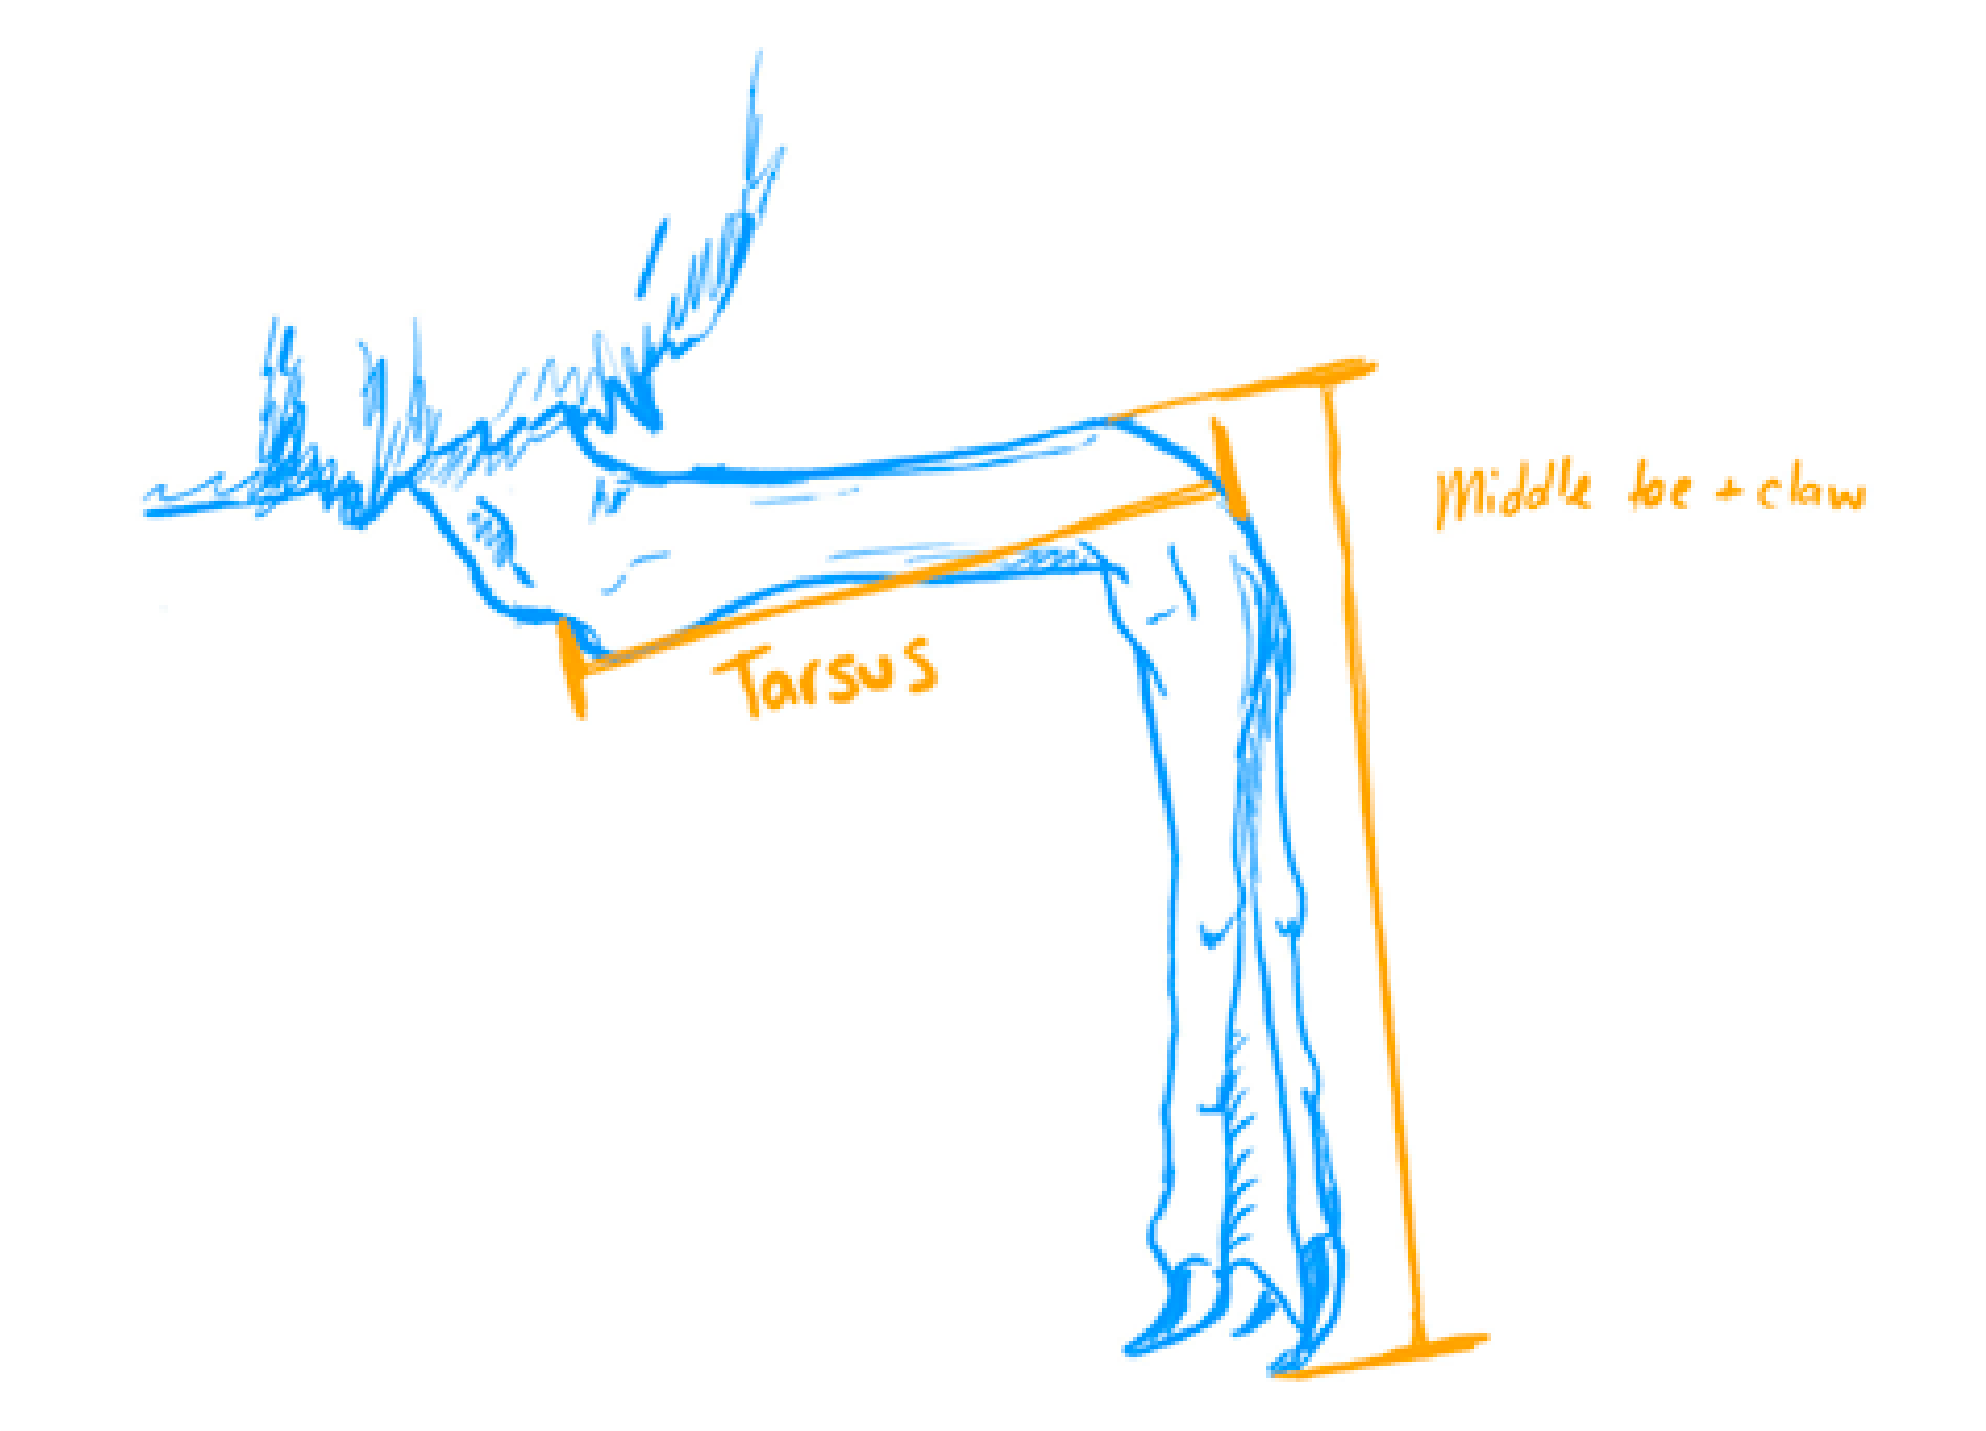
Figure 111. Standard measurements. Graphic by Edin Whitehead.
Additional measurements that can be taken to consider body condition include fat scores, feather moult patterns, feather stress bars and parasite load. Breeding condition can be assessed (at the right time of year) by looking for a brood patch and scoring it according to how developed it is (there are established brood patch scores that can be used to identify the stage the brood patch is in, see Section 3.4). During the fledging season, newly fledged birds can often be differentiated from adults by the presence of down (although note that this may be hard to find depending on how recently the bird fledged, so look carefully – the underwing feather tips are often the last place to shed down, also the flanks above the legs and around the neck). Look at the ‘perfection’ of the feathers (i.e. no wearing on the wing tips, no evidence of sun damage on exposed parts of the feather, etc), or the presence of drawn tips on ends of flight and secondary feathers, where the downy feather has dislodged from the flight feather. Birds with clean new feathers all over the body will most likely be a fledgling as adult birds will have older feathers mixed with new feathers in their plumage.
There are multiple considerations that should be borne in mind when conducting measurements, as these measurements rely on the highest levels of data quality to be useful. For measurement comparisons where the differences may be slight, every millimetre counts!
- Having the right equipment is key. Having good quality, precision wing rulers, tail rulers, callipers and scales leads to good quality data collection. Make sure your equipment is kept in good condition and cleaned and sterilised after every foray into the field.
- When different people are measuring birds in a study, you may inadvertently introduce individual measurement biases. One person may tend to overestimate certain measurements for example. To ensure this does not happen, either have the same person always carry out the measurements throughout the study, or if there are multiple people conducting the work have each person measure the same series of birds and look at the data to see if there are any obvious differences. Always record who took the measurements.
- Make sure everyone understands exactly what the measurements that are being taken are, as there are differences in the ways that people learn to take certain measurements. The best way to do this is to have a clear diagram available for everyone to consult, like the one in this manual.
- Consider which measurements will be the most useful. Bill length and tarsus, for example, are both measurements where there is little room for error as the body part is so clearly defined. Wing lengths are often a key measurement, but flattening a wing for measurement can lead to significant variation in the same measurement (i.e. how flat and straight was the wing exactly? Did the bird keep moving around?). Unflattened wing measurements may be more accurate but may not allow comparison with other studies or museum skins. Also check that the wing are not in the process of moulting. The outer primary is normally the longest wing feather, but it varies by species.
- Unless you are specifically measuring growth rates, avoid measurements on developing chicks. Because they are growing constantly until fledging, lengths and widths change over the time the bird is in its nest/burrow and this temporal effect will create issues for you between individual comparisons.
- The mass (weight) of a bird can vary depending on whether a bird is carrying a food load or not. An adult caught on its way to a burrow to feed its chick will be significantly heavier than a bird on its way back out after the food has been delivered. In those scenarios, waiting for the bird to feed its chick and re-emerge will standardise the measurement as well as reducing the possibility that the bird will regurgitate a critical meal for its chick while being handled.
- Be very careful with any birds that might be carrying an egg. An egg will feel like a hard round shape in the lower abdomen. Rough handling could cause the bird to stress lay in the bag. Consider timing of breeding when you are capturing birds.
- Take detailed notes on exactly how you defined each of your measurements. Clearly state how each measurement was taken and specify which units are being used (i.e. mm versus inches). The more detailed you are, the easier it will be to replicate your study to allow for direct comparisons with future work.
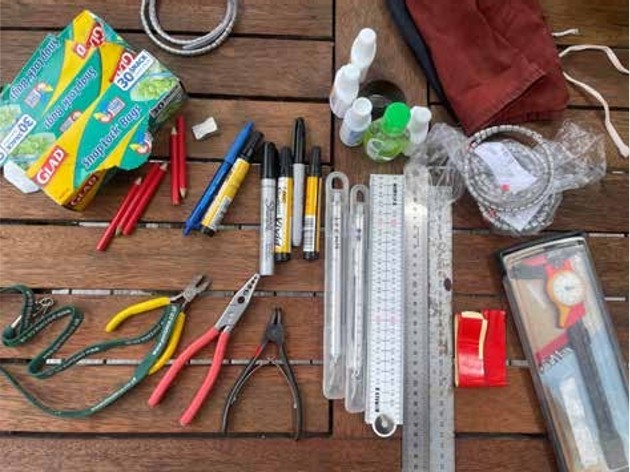
Figure 112. Equipment for taking measurements: Wing rulers, tail rulers, callipers and Pesola scales (different weight ranges). Photo: Edin Whitehead.
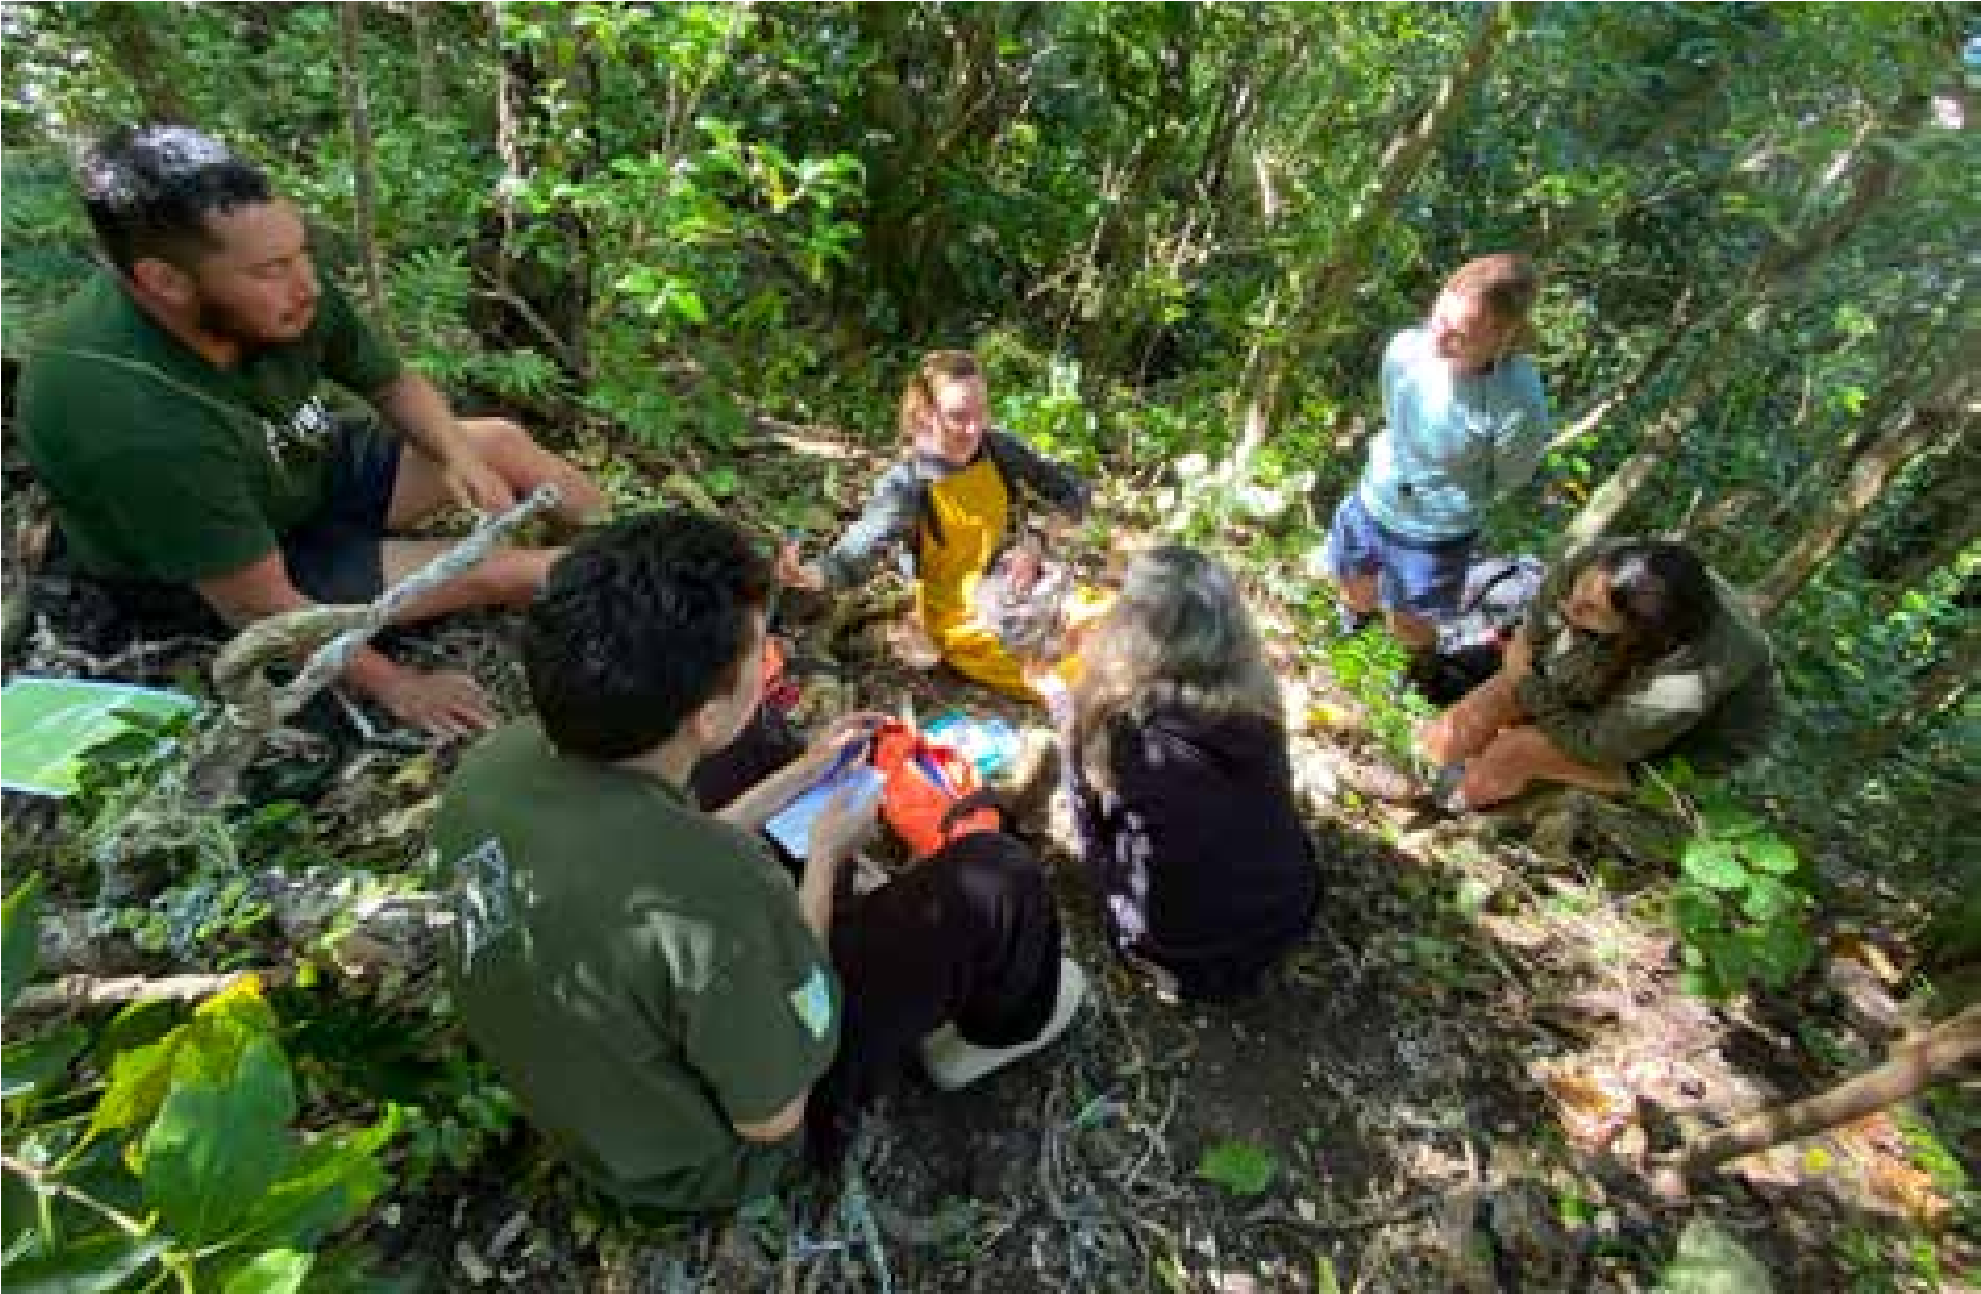
Figure 113. Explaining taking measurements and samples for Grey-faced Petrels, Taranga Island, Aotearoa New Zealand. Photo: Chris Gaskin.
Lastly, a reminder that when handling birds, hygiene is critically important. There are multiple communicable diseases and parasites that can be inadvertently passed from bird to bird (and bird to human) when handling them. Ensure you use best practice hygiene standards during any study that involves a hands-on approach. If possible use different clean bird bags for each bird. Wash and sterilise all holding bags between trips to different colonies. Use hand sanitiser to clean your hands between birds and at the end of a session. This will also take care of any cuts or nicks you may have obtained during bird-handling.
Keep an eye out for signs of disease (e.g. pox lesions) or high parasite load (e.g. feather mites) in your study species during your work, and if you see any signs that your study species may be afflicted by them re-evaluate your study protocols further. Do you need to continue the work in these conditions? And if so, what additional measures do you need to put in place to prevent disease or parasite spread?